October 13, 2026 by Debbie Westbrooks
Chalk Couture Barn Project With Textured Snow
Live Videos · DIY · Home Interior
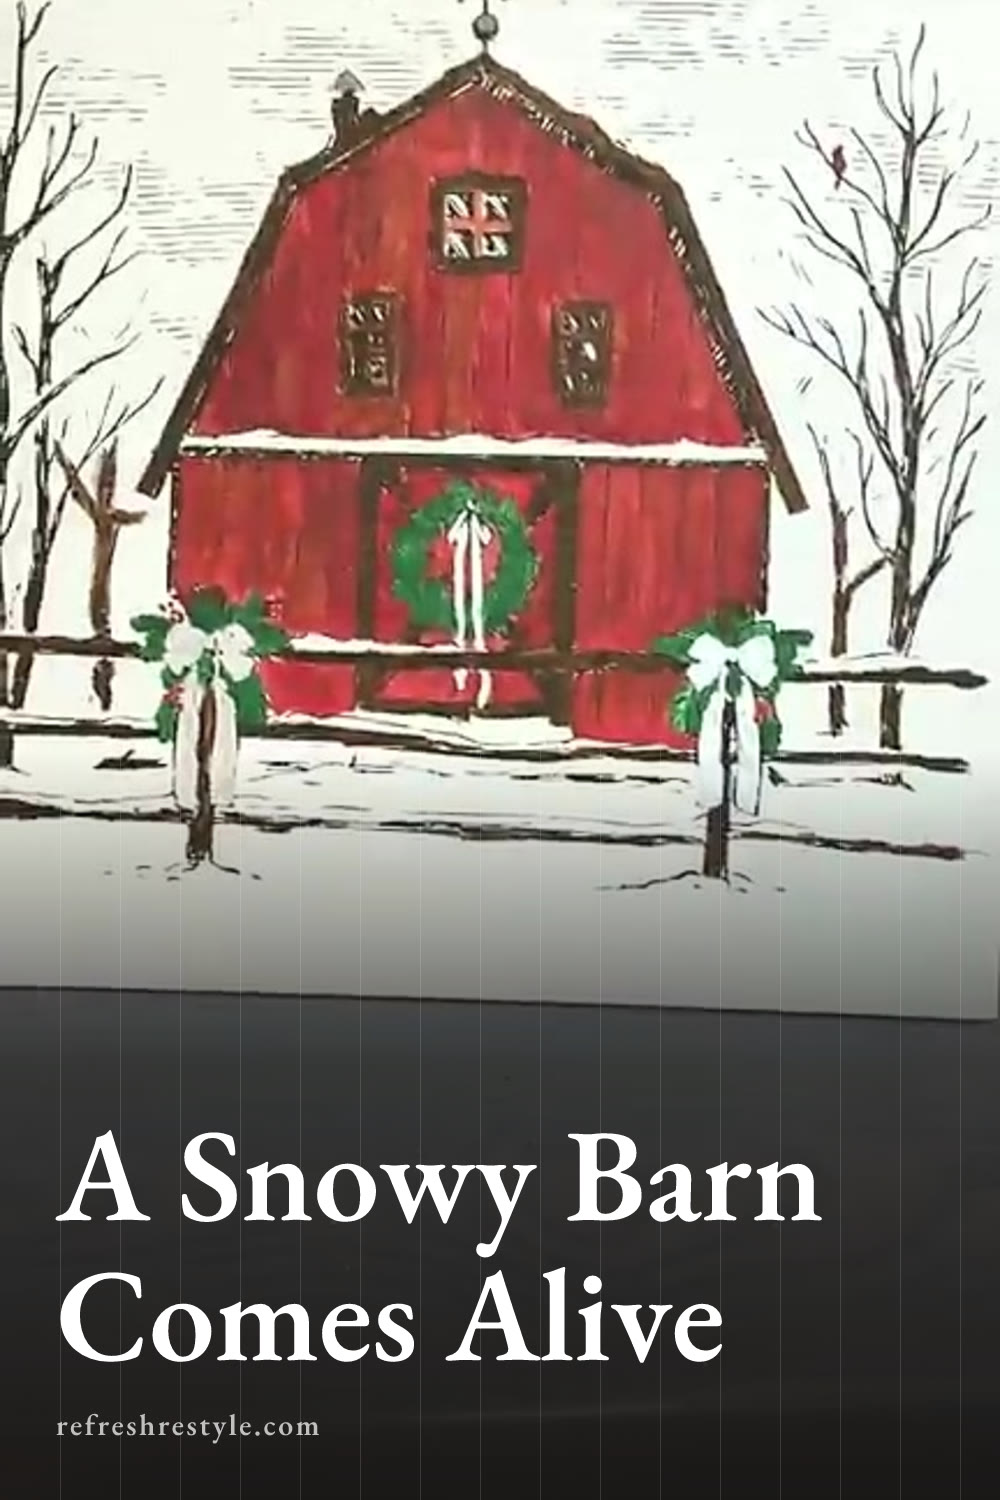
I made a large snowy red barn sign on an 18 by 18 wood grain board, and this Chalk Couture project turned into such a pretty winter statement piece. The weathered red barn, silvery accents, and raised snow all work together, but each part was simple to add.
My Chalk Couture barn project
The board already had a wood grain finish that I loved, so I left the background just as it was. I positioned the grain horizontally and centered the large barn transfer over the surface.
For the first layer, I covered the entire design with Espresso. That gave me the barn, fence, trees, clouds, and all the small details in one pass. The brown looked pretty enough to leave alone, and a one color version would make a lovely farmhouse sign, but I wanted an old red barn with plenty of winter texture.
I removed the transfer and set it aside to wash. I had a second transfer available for my next layer, but you can wash the original and use it again. Make sure it is clean and the painted surface is fully dry before placing it back over the design.
Painting the weathered red barn
I used Cherry for the main barn color and added water so it would move more like watercolor. A small paintbrush gave me enough control to work inside the transferred lines, and the first Espresso layer made the whole process feel like coloring in a very large coloring book.
I mixed a little Espresso into the Cherry as I worked. Old red barns usually have darker areas, faded boards, and shadows under the roofline, so the brown helped soften the brighter red. I concentrated more Espresso around the windows, under the eaves, and in a few random spots across the siding.
The color variation was one of my favorite parts. Some areas stayed more solid red while others became deeper and softer, and that uneven finish made the barn look worn and aged. You can keep your barn a solid color if that fits your style. I enjoyed letting the two colors blend right on the board.
I worked fairly close to the original lines, but I gave myself room to enjoy the painting. The second transfer layer brings those details back, so every painted edge can have a relaxed finish.
Adding greenery and small details
Once the main barn color was in place, I moved to the greenery. I used the green color called Wild Acre on the branches and greenery around the building. I also added a little Espresso to the fence, trees, and shadowed areas.
The tiny bird became a red cardinal. I love cardinals, so that choice was easy for me. I also painted the berries red after trying them in white.
The bows received an unexpected finish. Several viewers suggested silver, and I decided to try it even though I wondered whether it would show against the wood grain. It looked gorgeous. The shimmer caught the light and gave the rustic scene a little sparkle without taking attention away from the red barn.
Reapplying the Chalk Couture transfer
After drying the painted areas, I lined the barn transfer up with the original design. A light fuzzing helped reduce the stickiness before I placed it over the painted surface.
I considered using Espresso again for this layer, but I chose Storm instead. The gray brought in a fresh color and made the trees feel frostier. It also restored the barn siding, window details, branches, fence lines, and other parts that had softened while I painted.
When you make this project, lift sections of the transfer as you work so the color stays smooth in the screen. Careful alignment helps, but a tiny shift can add to the painted look. I allow those little imperfections in my projects because they make every finished piece feel personal.
The second transfer pass really brought the whole scene alive. The barn looked more defined, the fence returned, and all those fine winter details became visible again.
Making textured snow with spackle
For the snow, I used lightweight spackle, the same kind used to fill small holes in a wall. It dries white, holds its shape, and creates an easy raised texture.
I applied it with a small stir stick, although a putty knife would work too. I started along the roof and added small piles where snow would naturally collect. From there, I moved to the fence, windowsills, tree branches, and ground around the barn.
You can apply a thin layer for a light dusting or build it up for the look of a heavy snowstorm. I piled mine a little thicker in several places and let some of it hang over the roofline. Small dabs in the bends of the tree branches helped connect the raised snow to the transferred design.
The spackle gave the sign a three dimensional finish that flat white color alone wouldn’t create. Snow texture products can create a similar effect, but I already use lightweight spackle for other craft projects and liked how easy it was to spread.
Displaying the finished barn
At 18 by 18 inches, this piece is large enough to use as a focal point on a mantel or wall. The natural wood grain keeps the background warm, while the red, green, silver, gray, and white create a snowy daytime scene.
A hanger can be added wherever it works best for your display. Since the board is thick and the design fills the surface, it also has enough presence to lean against a wall as part of a winter arrangement.
Chalk Couture supplies I used
You can shop my full Chalk Couture store here.
I am an independent Chalk Couture designer, so I earn a commission on these links. See my disclosure for more.